

Sal's Dragon
My good friend Sal sent me a Christmas package to the Tayler family. His gifts were all very thoughtful and well-chosen, as is exemplified by the dragon he sent me. 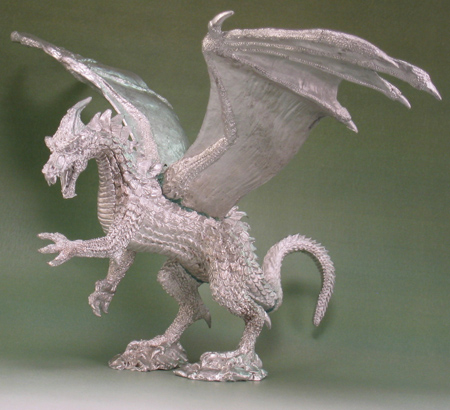 I recall admiring the unassembled miniature when I stayed in his home last spring, so imagine my thrill when I saw that he'd chosen to give the wee beastie a new home. Granted, at that point said wee beastie still needed to be assembled. One foreleg, one hind-leg, both wings, and about half his tail needed to be pinned and glued to his body. I set about that project on Tuesday morning at the insistence of my almost-four-year-old ("Daddy, let's put your dragon together!"). It actually went a LOT faster than I expected -- the pewter was nice and soft, the drill-bit I selected was nice and sharp, and when I was done pinning parts in place and super-gluing, you could swing him around the room by a wing and he wouldn't come apart. I might come apart in fury, but the dragon wouldn't. After assembly I noticed some rather large gaps and seams that needed filling. The worst of these was along his spine where the wings join. I chose to use "green stuff" kneadatite epoxy putty to create several rows of "feathery" scales between his spine ridge and the wings themselves.
 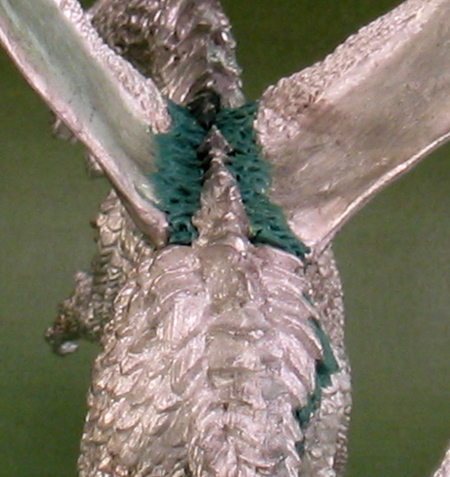 By far my favorite bit of sculpting, however, was the thigh joint. Here I extended a few existing large scales (and one in particular) to cover the seam, and then built an entire layer of scales to blend into the layer below.
 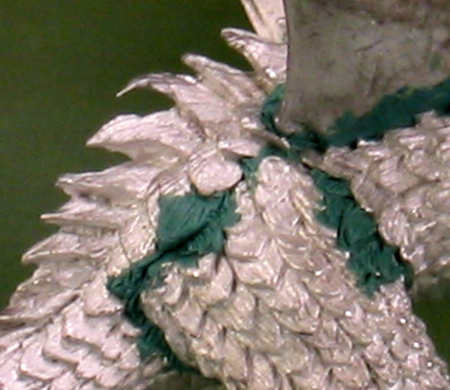 In these pictures the dragon still awaits a coat or two of primer. Yesterday I primed him in black, and to delight my sculpts blended right in with the rest of the model. Sandra and I have decided to make this a team project. She'll handle base-coating the scales, belly, and wings, and I'll take care of the highlighting, shading, and finishing touches. The claws and wing-tips have to go last because I'm sure that during the unavoidable handling any paint on those tips will get rubbed off. Sal, thank you. I'll post pictures of what Sandra and I end up doing. And I assure you that it'll end up looking better than the paintjob the manufacturer suggests.